There is nothing quite like a yummy bowl of pasta to satisfy a hunger!
Today we are keeping it light, this time with fresh heritage tomatoes and zesty lemon basil pesto this pasta is great eaten warm or cold the next day as a pasta salad.
This colourful dish is great for a midweek dinner or a quick meal after a busy weekend.
Prep time – 5 mins, Cooking time – 20 mins, Serves 6

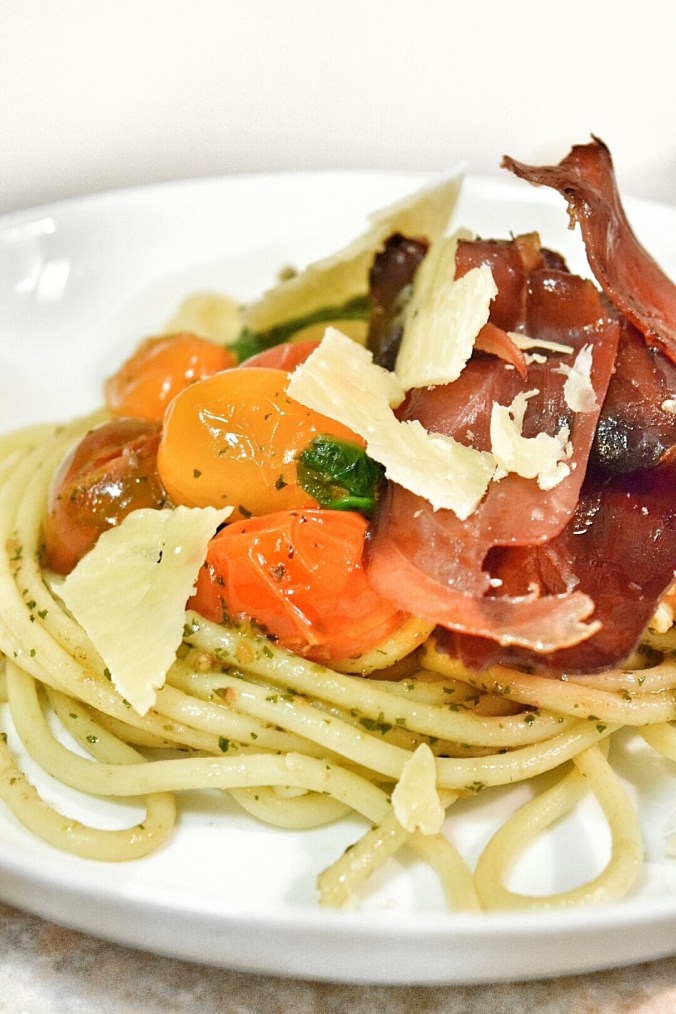
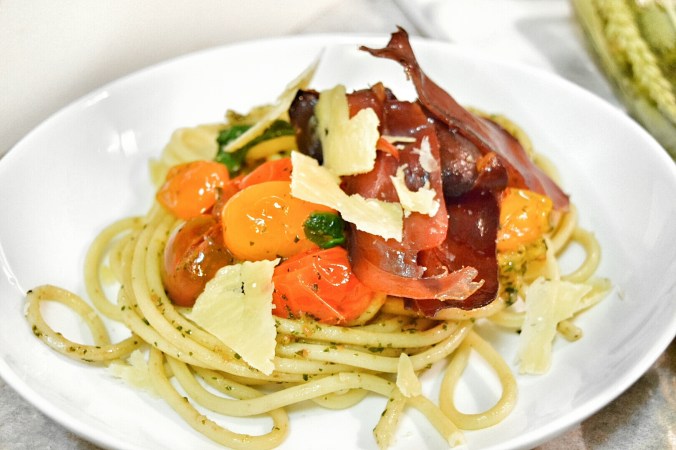
Heritage Tomato & Pesto Spaghetti
500g spaghetti
1tsp olive oil
100g of prosciutto – sliced
350g cherry tomatoes, halved – I used heritage tomatoes for the colour
50g semi sundried tomatoes – chopped
60g baby spinach leaves
150g basil pesto – I used my Lemon Basil Pesto
Shaved parmesan and cracked pepper to serve
- Preheat oven to 150 degrees C. Cook the pasta in a large saucepan following the packet instructions. Cook until al dente. Drain, but reserve about 3/4 cup of the cooking liquid.
- Line a baking tray with aluminium foil and lay the slices of prosciutto evenly over it. Bake untill just crisp and set aside.
- In a frying pan add the oil, when hot add the tomatoes, string often. Cook until the tomato starts to soften, should take about 3 minutes. Add the spinach and cook until it just starts to wilt. Add the spaghetti to the pan along with the reserved liquid and pesto, tossing to combine.
- Break the prosciutto into shards, and add to the pasta tossing again to combine.
- Plate up and top with freshly shaved parmesan and pepper.
- Enjoy!
~A