Cornbread

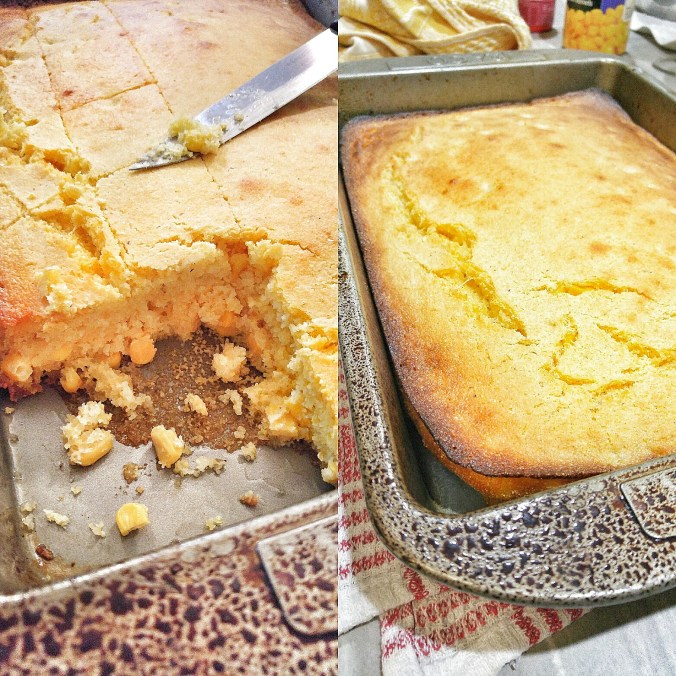
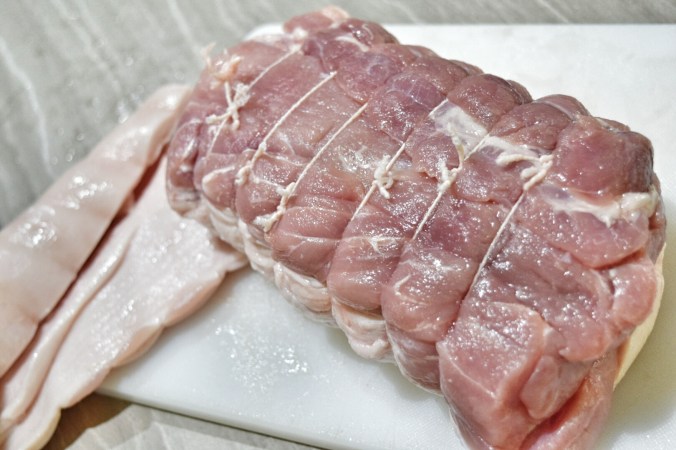
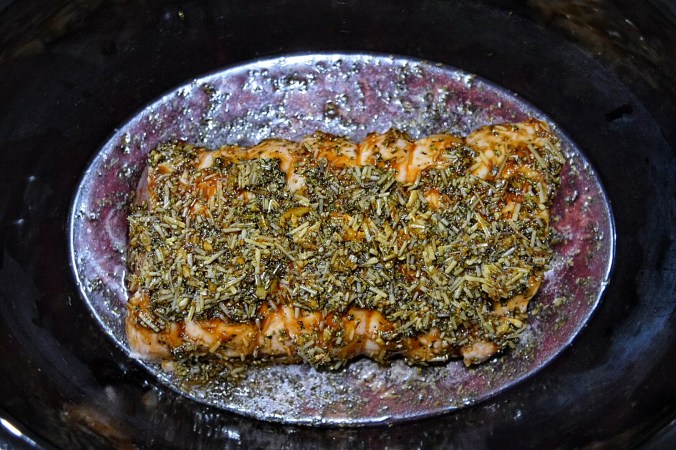
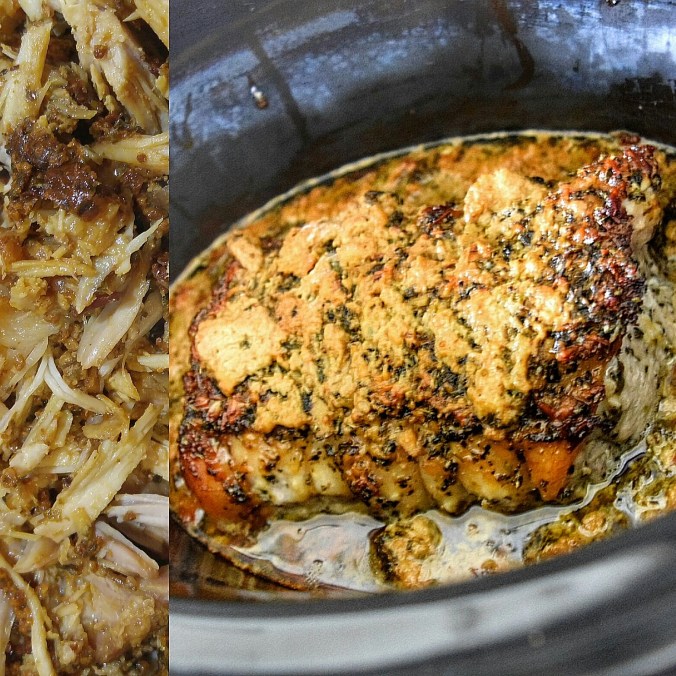
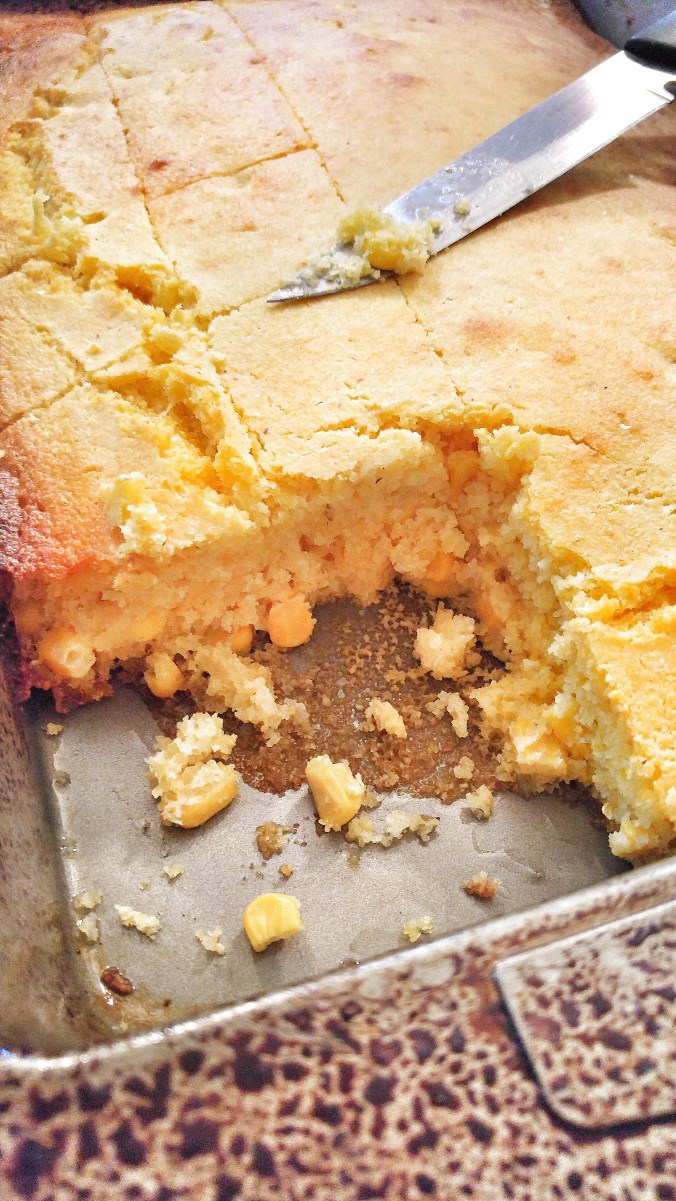
Cornbread is a staple of Southern style cooking and is just generally yummy and can be eaten whenever you want! (That’s the rule in our house anyway!) This recipe is relatively simple and a great addition to any Southern style meal (like this Slow Cooker Honey Parmesan Pork Roast!).

Why not try it the next time you make something saucy as it’s perfect for mopping up your plate after a meal.

Prep time – 20 mins, Cooking time – 30-40 mins, Serves 12

20160312_190748-01.jpeg

Cornbread

1 ¾ cups Cornmeal*

¾ cup plain flour

4 tsp baking powder

¼ tsp bi carbonate of soda

1 tsp salt

¼ cup sugar

2 cups buttermilk

¼ cup vegetable oil

2 eggs

2 cups corn kernels (canned is fine, make sure it is drained)

20160312_193451-01.jpeg

  1. Pre-heat your oven to 220 degree Celsius and place a heavy based cast iron pan inside to heat up.
  2. In a bowl mix the cornmeal, flour, baking powder, bi carb, salt and sugar.
  3. In a separate bowl mix the buttermilk, eggs, oil and corn kernels.
  4. Make a hole in the dry ingredients mix and gently pour in the wet ingredients and mix well. Your batter should be wet. Don’t worry!
  5. Take your cast iron pan out of the oven and pour in some oil/butter/bacon fat (all of these will work, you just need enough to coat the bottom of the pan). If you don’t have a cast iron pan a baking dish that has been well buttered will also work.
  6. Into your hot pan gently pour the batter, you should hear a sizzle as the batter starts cooking. Place immediately into the oven and cook for 30-40minutes or until golden and a skewer comes out clean.
  7. When cooked removed from oven and let sit for 10mins. Turn out onto a rack and allow to cool further.
  8. Enjoy with your favourite meal or just on its own, this cornbread will be super yummy either way!
  9. Enjoy!

~A

*If you can’t source cornmeal, polenta will also work, it’s basically the same thing, just not milled as finely as cornmeal.

img_20160313_100059.jpg

Slow Cooker Honey Parmesan Pork Roast

My Hubby is obsessed with anything southern, slow cooked or smoked. I don’t blame him really, so am I!

Slow cooking is one of my favourite things to do. Most nights in our household are full of extra curricular activities, be that indoor soccer, agility training with Saki-pup or Japanese sword training, so there isn’t much time left to prepare a proper meal. That’s where the slow cooker comes in! Quick prep the morning of, or night before then chucked in the slow cooker to cook all day, and come home to the house smelling amazing with a delicious meal ready at our fingertips. Who wouldn’t like that!?

Prep time – 10 mins, Cooking time – 6 hrs, Serves 6

dsc_0362-01.jpeg

This roast recipe is one my husband found while perusing the internet and insisted that we make it for a big family dinner this weekend. Coupled with corn bread, coleslaw and potato bake, this roast is just perfect.

The principle of this roast is really very simple, and you can change up your marinade and sauce as you see fit. So why not give it a go next time you don’t feel like slaving away in the kitchen. Let your slow cooker do the hard work for you!

dsc_0355-01.jpeg

dsc_0358-01.jpeg

dsc_0360-01.jpeg

20160312_190949-01.jpeg

20160312_192010-01.jpeg

Slow Cooker Honey Parmesan Pork Roast

2kg boneless pork loin roast

2/3 cup grated parmesan

½ cup honey

3tbs soy sauce

1tbs dried basil

1tbs dried oregano

3tbs chopped garlic

2tbs olive oil

½ tsp salt

2tbs corn flour

¼ cup chicken stock

1tsp sugar

  1. Turn slow cooker to high and place roast and any juices from roast into the slow cooker.
  2. In a bowl combine parmesan, honey, soy sauce, basil, oregano, garlic, oil and salt.
  3. Pour mixture over roast and cook on high for the first 2 hrs, reducing to low for the remaining 4 hours or as long as it takes for a meat thermometer to read 160 degrees.
  4. Once cooked remove the meat and set aside.
  5. Strain remaining juices from the slow cooker and place liquid into a small sauce pan over a low/medium heat.
  6. Mix the corn flour and chicken stock together (make sure there are no lumps).
  7. Add corn flour mixture to the slow cooker juices and simmer until thickened, stirring well. A teaspoon of sugar or more honey can be added if you feel the sauce needs to be sweeter.
  8. Pull roast apart with a fork into rough chunks and serve with glaze and your favourite sides.*
  9. Enjoy!

~A

*for a delicious side option why not try this delicious Cornbread recipe. It goes perfectly with this dish to soak up all those yummy juices!

img_20160313_100341.jpg

Easy Blueberry Muffins

Growing up blueberries were a constant staple in our household. I swear my mum had a slight obsession with them! Sundays nearly always consisted of super thin pancakes rolled with blue berries in the middle and dusted with icing sugar, so yummy!

I love these muffins because the flavours remind me so much of those Sunday treats but they are so much more user friendly! Perfect for morning tea snacks, or a quick breakfast option you wont regret making these muffins.

Prep time 15 mins, Cooking time 20 mins, Makes 12

dsc_0353-01.jpeg

dsc_0352-01.jpeg

Easy Blueberry Muffins

1 cup canned blueberries – drained (can also use fresh or frozen, or any other berry of your choosing!)

1 cup self-raising flour

1 cup plain flour

1 tsp baking powder

¾ cup milk

¼ cup vegetable oil

½ cup caster sugar

½ tsp salt

1 large egg

Cinnamon sugar

dsc_0351-01.jpeg

dsc_0350-01.jpeg

  1. Preheat oven to 200 degrees C. Prepare your muffin tray by either placing muffin cups into the tray or by greasing the tray.
  2. In a mixing bowl beat together the egg, milk and oil until well combined.
  3. Once combined place a sieve on top of the mixing bowl and place in gently the flours, baking powder, sugar and salt. Once all in sift into the wet ingredients mixture. Using a wooden spoon mix flour and egg mixture together until smooth.
  4. Gently fold in the blueberries (or your choice of fruit).
  5. Scoop about 2 tbs worth of muffin batter into your prepared muffin tray cups. Top with a sprinkle of cinnamon sugar.
  6. Bake for about 20-25mins or until a skewer comes out clean.
  7. Enjoy!

~A

Chicken, Corn and Noodle Soup

I had a really hard time figuring out what to say to introduce this meal. Its been a tough couple of days in our household. A very good friend suffered horrible injuries in a freak accident which landed her on the operating table and now in hospital for at minimum a week.

When I got home today from seeing her, the last thing I wanted to do was cook but I knew I should make something. I had a look and found that we had left over BBQ chicken and enough in the pantry to create this comforting soup. It turned out to be just what I needed.

That whole chicken soup for the soul stuff? They might actually be onto something. Just wish I could have taken some in so our friend didn’t have to eat hospital food!

If you read this, please send good vibes to our dear friend for a speedy recovery!

Now, on to the yummy stuff!

Prep time 15 mins, Cooking time 15 mins,  Serves 6

dsc_0346-01.jpeg

dsc_0344-01.jpeg

Chicken, Corn and Noodle Soup

420g can sweet corn kernels

420g can creamed corn

270g packet dry ramen noodles

1 small bunch spring onion

2 eggs – beaten

1tbs sesame oil

3tbs soy sauce

1 litre chicken stock

1 ½ tbs corn flour

5 tbs water

½ BBQ Chicken – shredded (I used left overs so about ½ a chicken was more than enough)

1 inch piece of ginger – grated

This slideshow requires JavaScript.

  1. Bring stock to the boil and add in one strand of spring onion and the grated ginger.
  2. In a bowl mix the two tins of corn and add soy, oil and beaten eggs mixing till combined.
  3. Add corn mix to the stock. Stir well and removed strand of spring onion.
  4. Add shredded chicken to the stock mixture.
  5. In a cup mix the corn flour and 5 tbs water making sure there are no lumps.
  6. While the pot is boiling, add the corn flour and water and stir until thickened slightly.
  7. Add ramen noodles and cook until tender.
  8. Serve topped with sliced spring onion and your favourite crusty bread.
  9. Enjoy!

~A

Basic Pancakes

I woke up this morning and it was raining! If you know anything about North Queensland you’ll know that we have been in drought and haven’t seen consistent rain in a long while!

So when I went to bed and it was raining, then woke up and it was STILL raining, I figured it was time to celebrate!

Pancakes seemed like a fitting Saturday morning celebration food!

These are super simple, very yummy and is easy enough to double if you have to feed a crowd.

Prep time 10 mins, Cooking time 10 mins, Serves 2 (4 small pancakes per person)

dsc_0319-01.jpeg

dsc_0320-01.jpeg

Basic Pancakes

1 cup self-raising flour, sifted

Pinch of salt

2 tbs white sugar

¾ cup milk

1 egg, beaten

30g butter, melted

1 tsp vanilla extract

Spray oil for cooking

dsc_0321-01.jpeg

  1. In a medium bowl combine flour, sugar and pinch of salt.
  2. In a separate bowl, melt the butter in the microwave on high for about 30 seconds.
  3. Into the butter add milk, vanilla and beaten egg. Be sure to do it in this order, if you add the egg first the heat from the butter may cook it, but if you cool with milk first you should be ok!
  4. Create a dimple in the centre of the flour mixture and pour the wet mixture into the hole you have made. Stir until well combined. You should have no lumps; the batter should be thick and smooth. Set the batter aside for 5-10 minutes.
  5. Heat a heavy-bottomed, non-stick pan over a low-medium heat and coat it with oil. Use a consistent amount when making these pancakes so that they turn out roughly the same size. I used a small ladle, you may want to use a 1/4 measuring cup.
  6. Cook until the initial side is golden, or until the top surface forms bubbles. Flip and repeat on the other side. I found to help the cooking process go faster, simply place a lid on the frying pan while cooking. This also helps solidify the top side so that when you go to flip you don’t end up with a battery mess.
  7. Enjoy with your favourite toppings (for me that’s maple syrup or fresh fruit!)

~A

dsc_0322-01.jpeg

dsc_0320-02.jpeg

The Ultimate Hedgehog Slice

Back in the day I had been known, when feeling slack, to delve into the realm of packet mixes. I know, slap me on the wrist.

One day, my husband Paul decided that he wanted me to make hedgehog slice. So off we went to the shops ready to get all the ingredients, but as we were cruising down the baking isle he spotted a packet mix for the slice. He told me I should save myself the trouble and just use  a packet mix. I tried to talk him out of it but no, he wanted the packet mix because the picture on front looked soooooo amazing. So I gave in.

You know those Pinterest fails that are going around the internet? Yes? Well it basically turned out like that! My guess is at the time we got it, it must have been out of date because what it turned out as was anything but the delicious hedgehog slice shown on the packet! It resembled tar. No joke, and it didn’t taste much better either!

So from that day forward I vowed never again to use a packet mix. My solution to the lazy man’s Hedgehog slice follows! Fair warning though, this baby is so rich and delicious you may only be able to handle a little at a time!

Serves 15, Prep time 20 mins, Total time for cooling approx.  6 hrs/overnight

dsc_0315-01.jpeg

dsc_0311-01.jpeg

Ultimate Hedgehog Slice

400g dark melting chocolate

150g butter

1cup icing sugar

1 ½ packets Arnott’s Scotch Finger biscuits

150 g packet hazelnuts – chopped

1 egg – beaten

1tsp vanilla extract

Icing

1 cup icing sugar

½ cup cocoa powder

2tbs milk/water

Chocolate flakes (optional extra)

dsc_0314-01-01.jpeg

  1. Melt chocolate, butter and sugar in a glass bowl, you can use the microwave for this just be sure to stop every 30 seconds to stir.
  2. Once completely melted and mixed together add the egg and vanilla extract. Be sure to combine well, then heat once more in the microwave for 30 seconds to ensure the egg stays warm enough to cook through. Your mixture should turn a glossy chocolate colour and be smooth.
  3. In a separate bowl crush the biscuits and mix in the chopped hazelnuts.
  4. Add the biscuit mix to the chocolate and combine until all the biscuits are covered in chocolate.
  5. Spoon mixture into a lined 20 x 30cm slice tin pressing down to ensure the mixture is packed in.
  6. For the icing, simply mix all ingredients together to form a thick paste. When fully combined drizzle the icing over the slice evenly to smooth out the surface. You can also tap the tin lightly on your counter top to reduce any air bubbles or gaps that might not have been filled at first. Feel free at this point to top with chocolate flakes.
  7. Chill in the fridge over night or for at least 6 hours. When fully hardened remove from the time dust with icing sugar and slice with a sharp hot knife (run under hot water – I managed to cut 15 slices about 2-3 inches square, this is very rich so if you think you you can handle more, feel free to cut larger slices!).
  8. Enjoy!

~A

Sesame Ramen Noodles

Our time in Japan last year for our honeymoon saw us eating many questionable things, especially when we had a stay at a ryokan (traditional accommodation). I’m talking breakfasts with more eyes than I have fingers, and easily 7 different species of sea creature on each plate! While that was an experience, we tended to lean more to things that we could recognise when out and about. Noodles of every kind fast became a favourite!

20160301_202027-01.jpeg

While we were in Hiroshima we found this great looking noodle store attached to the main train station. We thought great! Normal food! Well… kind of… We took our seats and were given a menu. The menu seemed to indicate a hotness scale to the food. 1 being so bland that no one would even think about being so boring and 100 being insanely hot, we are talking surface of the sun. Well let me tell you, I think we got played hard at this place! We, being simple Australians thought we better stick to the basic boring number 1 on the scale, but when ordering the lovely young Japanese man suggested (persuaded, shamed us into…) getting at least a number 2 on the scale. The starting level he said. So being the nice folk that we are, and not wanting to insult anyone, we agreed. Number 2.

20160301_202006-01.jpeg

Have you ever eaten something so hot that your lips tingled for a hour afterwards? Well I hadn’t until that day. Middle of a Japanese summer and I am literally on fire. It was the strangest thing, the noodles were amazingly delicious but so damn hot! The more you ate the better you could deal with the heat and the more delicious the noodles became, but once you stopped it was like the surface of the sun was your new lip gloss.

The most strange thing for me is since I’ve had these noodles in Hiroshima I’ve wanted more! So here is my attempt at Sesame Ramen – way less like the surface of the sun but still just as yummy!

20160301_202015-01.jpeg

Sesame Ramen Noodles

3tbs sesame oil

3tbs peanut oil

¼ cup soy sauce

2tbs rice wine vinegar

3tbs white sugar

4 cloves of garlic – finely chopped

Ground cayenne pepper to taste

Chilli flakes to taste

180g packet of ramen noodles

1 small bunch of spring onion finely sliced to serve

20160301_202048-01.jpeg

  1. Bring a large pot of water to the boil. Add ramen noodles and cook as per packet instructions.
  2. While the ramen is cooking in a small bowl mix oils, sugar, vinegar and garlic. Add spices now if you wish, and mix well.
  3. After draining the noodles simply stir through the sauce and serve hot.
  4. Top with finely sliced spring onion and extra chilli flakes.
  5. Enjoy!

Tip: I always make the bulk of the mixture with less heat (chilli) and add a little more later by mixing a small bowl of soy sauce and sesame oil with added cayenne pepper for those that love their noodles spicy!

~A

Jam Drop Biscuits

An oldie but a goodie these jam drops will leave you wanting more! Very quick and easy to make, these biccies come out light and fluffy and are a total crowd pleaser.

Prep time 10 mins, Cooking time 20 mins, Makes 24

image

image

Jam Drop Biscuits

125g butter – softened

2 large eggs

2 cups self raising flour

3/4 cup caster sugar

1tbs lemon juice

1tsp vanilla essence

1/4 cup jam – choose your favourite flavour

image

  1. Preheat oven to 180 degrees C.
  2. Line two trays with baking paper and lightly grease.
  3. Combine the butter and sugar using an electric beater until smooth and creamy.
  4. Add eggs, lemon juice and vanilla essence and continue to beat until smooth.
  5. When fully mixed add flour and stir in to form a dough. If the mix is too damp add a little more flour.
  6. Form small balls out of the dough and place on baking trays. With a spoon or your finger make small but deep holes in the center of your dough balls. Fill with your favourite jam and place in the oven for 20 mins or until golden.
  7. Remove from oven and let sit for a few minutes before transferring to a cooling rack.
  8. Enjoy!

-A

image

Squid and Cashew Stir-Fry

Crunchy and sweet this stir fry has quickly become a favourite. You can use your favourite veggies or just what’s left over in the fridge that needs to be used up. Either way teamed up with lightly battered squid, sweet sauce and cashews you cant go wrong!

Prep time 10 mins, Cooking time 15 mins, Serves 4

image

image

Squid and Broccoli Stir-fry

2 heads broccolini – chopped into small heads

1 punet mushrooms – halved

3 carrots – julliened

1 clove of garlic – chopped finely

3 bunches pak choy –  chopped into thirds

2 tbs brown sugar

1tbs fish sauce

1tbs soy sauce

1tbs sweet chilli sauce

3 squid tubes – sliced into inch wide strips and scored in a cross hatched pattern

1 cup plain flour

1/2 tsp Tuscan seasoning

Pinch of salt

1/3 cup peanut oil – for stirfrying and shallow frying

1/3 cup cashews

image

  1. Prepare the squid by slicing and scoring.
  2. Place flour, salt and Tuscan seasoning in a bowl and mix. Dust squid in flour.
  3. Shallow fry squid until just golden. Make sure oil is very hot. Set squid aside.
  4. In a small bowl mix sugar, fish sauce, sweet chilli sauce and soy sauce.
  5. Heat a tbs oil in a wok and stir fry all veggies except the pak choy until just tender. Add pak choy and stir fry for a further minute. Remove from heat and drizzle with sauce. Mix though.
  6. Plate up stir-fried vegetables and top with squid and cashews.
  7. Enjoy!

image

Apple Rose Tartlets

I’ve always admired food that had been made to look like something else. When I discovered just how easy it was to make these tartlets I jumped on the bandwagon!

Impress your guests with this super simple but impressive treat of beautifully rose-shaped apples in crispy sweet puff pastry.

Prep time 10 mins, Cooking time 40-50 mins, Makes 8

20160227_210804-01.jpeg

Apple Rose Tartlets

2 sheets puff pastry

2 red apples (red delicious are perfect)

3 tsp apricot jam

4tsp water

½ tsp lemon juice

1tsp Icing sugar (plus extra to dust)

1tsp cinnamon sugar

20160227_210738-01.jpeg

  1. Preheat oven to 180 degrees C. Prepare the apple by chopping in half and coring, then slice finely as pictured.20160227_200016-01.jpeg
  2. Place sliced apple, 3 tsp water, lemon juice and sugar in a bowl and toss, microwave on high for 1 minute or until apple is pliable. Drain liquid.
  3. Cut pastry sheets into four equal strips and lay apple slices as shown below.
  4. Mix remaining water and jam in a bowl then add jam mixture to pastry before folding pastry up and rolling (as pictured). Make sure to pinch the sides and push the apple into the pastry as rolling as it may try to slip out.

  5. Place rosettes into an oiled muffin pan and cook in the oven for approx. 45 minutes (checking from about 40mins onwards).
  6. When cooked dust tartlets with icing and cinnamon sugars and serve.
  7. Enjoy!

~A